
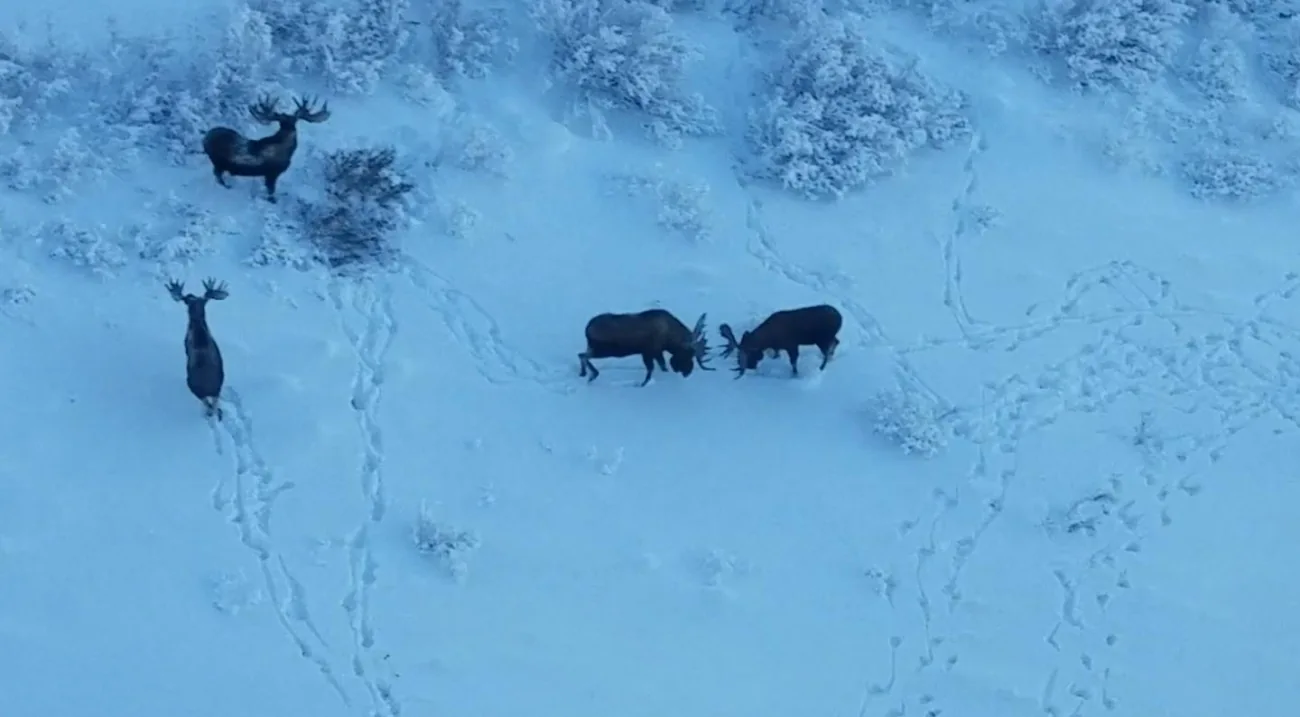
Representative photograph from the credited source, taken outside Saskatchewan. It is not a current sighting, a distribution map or a complete identification guide.
Image credit: USFWS · Public Domain · View image sourceWhat you will learn
- Compare Moose proportions with other deer-family animals.
- Use wetland and browse observations as questions rather than guarantees.
- Record the effort and limits of a visit.
An original SKHunter learning guide
Build a record, not a prediction
Teaching diagram · not a map- 01Observe
Look from a lawful position without moving closer to obtain an answer.
- 02Describe
Record visible features, time, light, distance and behaviour.
- 03Keep uncertainty
Separate what you saw from what you think it might mean.
One clue starts a question. Several consistent observations build a better record; uncertainty remains a valid outcome.
Start with the profile
A Moose comparison begins with the long legs, large projecting muzzle and overall body outline. A throat dewlap may be visible; mature males can carry broad, flattened antlers, but antlers are not available on every animal or throughout the year. Compare the whole profile with Elk in several reference photographs, including antlerless animals. A dark shape in willows is only a dark shape until the distinguishing features can be seen. Do not move closer or provoke movement to complete an identification checklist.
Read the vegetation without reducing Moose to a pond icon
Moose eat woody browse as well as aquatic vegetation, and what is available changes with the season. A wetland is therefore one landscape feature to investigate, not a complete description of Moose habitat or proof of current presence. In a notebook sketch, separate water, surrounding shrubs, forest cover and the lawful viewpoint. Note the vegetation you actually saw rather than assuming that a blue map symbol means open water or a passable shore. Remote imagery may show a different season from your visit.
Measure the visit, not just its outcome
A useful no-sighting entry explains how you looked: the time spent at the viewpoint, visibility, weather and areas hidden by cover. This makes later observations comparable. Keep travel notes alongside the sighting record when soft ground, a blocked approach or lack of reception affected the visit. If a practical constraint shortened the outing, record that fact rather than interpreting the result as animal absence. Plan a future visit from a verified approach and a realistic return time, with current permission and licence conditions checked independently.
Worked example: a wetland viewed from a safe distance
Your map shows water and shrubs. On arrival part of the shore is dry and dense vegetation blocks much of the view.
Put it into practice
- Record current water and vegetation conditions rather than repeating the map symbol.
- Write how long you watched and which parts you could not see.
- Keep any large-animal glimpse uncertain if the profile was obscured.
- Update the approach note and return plan; do not enter difficult ground to improve the view.
Turn a sighting into a useful note
A 36-second photographic motion explainer with gentle camera movement, four clear chapters and large on-screen words. Silent; optional captions and a transcript are available.
Choose a section or use the player controls. A text transcript is available below.
Read the video transcript
- 0:00
Describe what you actually saw — Record shape, markings and behaviour before assigning a species name.
- 0:09
Record the observation context — Add the date, viewpoint, light and approximate distance.
- 0:18
Keep uncertainty visible — A single track or a brief glimpse may remain unidentified.
- 0:27
Revisit without assuming — One sighting is not a population estimate or a promise for next time.
Common mistakes to avoid
Every Moose has broad antlers
Antlers vary with sex, age and season. Practise recognition using antlerless animals too.
Blue on the map proves the current conditions
Imagery and map symbols may not show today’s shoreline, water or ground conditions.
No sighting means the habitat is empty
Limited time and dense vegetation restrict what a visit can establish.
You saw no Moose during a short visit with a heavily obscured view. What is supported?
- No Moose use this parcel.
- The wetland is unsuitable in every season.
- No Moose were seen during that visit; visibility and duration were limited.
Show the answer and explanation
Answer: C. No Moose were seen during that visit; visibility and duration were limited.
The note describes the observation effort and its limits without making a population or habitat claim.
Current checks and official context
At a glance
- Moose are large animals associated with varied wooded and wetland landscapes.
- A water feature on a map is not a safe crossing.
- Choose an outing that your party can complete and reverse safely.
Habitat clues help plan a scouting visit. They do not establish that animals are present or that hunting is permitted.
Read the visible features, not just the setting
The long legs, long muzzle and overall body shape help distinguish Moose from other deer. Mature bulls can have broad, flattened antlers, but the view may not show every feature needed for a legal classification. Use an identification reference and keep the animal’s surroundings separate from the evidence used to identify it.
- Observe without moving closer for a better photograph.
- Write down which features were actually visible.
- Treat an unclear age or sex classification as unresolved.
Assess the whole route before leaving the road
Wooded areas, lake margins and wet ground are broad ecological clues. For trip planning, examine terrain, distance and a lawful approach in detail. An apparent shortcut across muskeg, water or a neighbouring parcel can change both safety and access. Plan communications, return timing and lawful retrieval options before a hunt, not after an unexpected event.
- Check current road and ground conditions.
- Choose a route the whole party can manage.
- Mark a clear point at which the outing will turn back.
Check the current licence and reporting path
Moose opportunities vary with zone and licence category, so use the final current guide and provincial update rather than a broad regional assumption. Match the precise WMZ, permitted animal class, dates, method and conditions. Check current wildlife-health submission eligibility and reporting instructions directly; requirements for another cervid species do not automatically apply.
- Keep the licence details with the parcel reference.
- Read all footnotes and local exceptions.
- Record the correct official contact for unresolved questions.
Turn this lesson into your next outing
Review the date, species, starting template and linked day plan in an editable preparation draft. You choose what to add and save.
Prepare your own trip
Review a preparation draftContinue learning
Moose fieldcraft: observe young forest and wetland edges from a workable routeTry a practical situation
Open related practiceOpening a draft does not create a saved checklist. A checked item records your own review, not permission or an open season.
Original sources
- Hinterland Who’s Who · Moose
- Government of Saskatchewan · Current Hunters Guide and updates
- Government of Saskatchewan · 2026–27 hunting opportunities
- Government of Saskatchewan · Current CWD testing instructions
- U.S. National Park Service · Moose
Use this as a planning guide. Check current official requirements and site conditions before travelling.
Help improve this guide
Tell the editor about something on this public page that needs attention.